Contents
Introduction
Most large aircrafts today are equipped with an ‘Automatic Dependent Surveillance Broadcast‘ (ADS-B) system. This equipment will be mandatory in 2017. It broadcasts flight data at 1090 MHz. A ‘Sofware-defined Radio‘ (SDR) USB dongle for DVB-T can be used to receive those signals, that can be decoded with the appropriate software.
The receiver
The receiver should be based on the Realtek RTL2832U chipset. Type numbers are E4000 and R820T. They can easily be found on eBay or Amazon. They usually come with a simple indoor rod antenna, which yields pretty good results. I can receive planes that are over 140 km away in the free sight direction. For even better results you may want to build your own dipole.
Install the build tools and the required library
If you don’t have the build tools installed run the following command. You also need libusb-1.0-0-dev.
sudo apt-get -fym install git cmake build-essential libusb-1.0-0-dev |
Install rtl-sdr
The software bundle contains the library to communicate with the DVB-T dongle and a number of tools to use it as an SDR.
mkdir git cd git git clone git://git.osmocom.org/rtl-sdr.git cd rtl-sdr mkdir build cd build cmake .. -DINSTALL_UDEV_RULES=ON sudo make install sudo ldconfig sudo cp ../rtl-sdr.rules /etc/udev/rules.d/ |
As we are not going to watch TV the default DVB-T driver needs to be removed and blacklisted. Create the following file:
/etc/modprobe.d/rtlsdr.conf |
Add this line to it:
blacklist dvb_usb_rtl28xxu |
Check whether the module is loaded:
lsmod | grep dvb_usb_rtl28xxu |
If it is found remove it:
sudo modprobe -r dvb_usb_rtl28xxu |
Install and run Dump1090
This software is used to capture and decode the ADS-B signal. It also presents collected data on a web page.
cd ~/git git clone git://github.com/MalcolmRobb/dump1090.git cd dump1090 make ./dump1090 --quiet --net --enable-agc & |
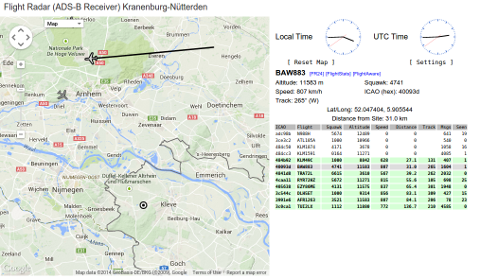
Now surf to to the Raspberry Pi’s port 8080 and you should see a map with flight data of all the planes within range. You may want to embed this in your own page, for instance:
<!DOCTYPE html>
<head>
<meta charset="utf-8">
<meta http-equiv="X-UA-Compatible" content="IE=edge,chrome=1">
<title>Flight Radar Kranenburg-Nütterden</title>
<meta name="description" content="Flight Radar (ADS-B Receiver) Kranenburg-Nütterden">
<meta name="viewport" content="width=device-width, initial-scale=1">
<link rel="stylesheet" href="css/main.css">
</head>
<body>
<h4>Flight Radar (ADS-B Receiver) Kranenburg-Nütterden</h4>
<iframe src="http://nitri.ddns.net:8080" name="flight-radar" width="95%" height="90%" align="center"
scrolling="no" marginheight="0" marginwidth="0" frameborder="0"></iframe>
</body>
</html> |
Customize Dump1090
The scripts config.js and script.js can be found in the public_html directory of Dump1090. Find this section in script.js to change the map:
// Define the Google Map var mapOptions = { center: new google.maps.LatLng(CenterLat, CenterLon), zoom: ZoomLvl, mapTypeId: google.maps.MapTypeId.TERRAIN, mapTypeControl: true, streetViewControl: false, mapTypeControlOptions: { mapTypeIds: mapTypeIds, position: google.maps.ControlPosition.TOP_LEFT, style: google.maps.MapTypeControlStyle.DROPDOWN_MENU } |
The terrain map gives the best result to my taste. You may also want to use OpenStreetMap:
mapTypeId: "OSM" |
Customize the appearance of the data layer in config.js. This should be self-explanatory:
// -------------------------------------------------------- // // This file is to configure the configurable settings. // Load this file before script.js file at gmap.html. // // -------------------------------------------------------- // -- Output Settings ------------------------------------- // Show metric values Metric = true; // true or false // -- Map settings ---------------------------------------- // The Latitude and Longitude in decimal format CONST_CENTERLAT = 51.785982; CONST_CENTERLON = 6.059338; // The google maps zoom level, 0 - 16, lower is further out CONST_ZOOMLVL = 10; // -- Marker settings ------------------------------------- // The default marker color MarkerColor = "rgb(127, 127, 127)"; SelectedColor = "rgb(225, 225, 225)"; StaleColor = "rgb(190, 190, 190)"; // -- Site Settings --------------------------------------- SiteShow = true; // true or false // The Latitude and Longitude in decimal format SiteLat = 51.785982; SiteLon = 6.059338; SiteCircles = true; // true or false (Only shown if SiteShow is true) // In nautical miles or km (depending settings value 'Metric') SiteCirclesDistances = new Array(40,80); |
To feed flightradar24 with your data you need to start a TCP30003 compatible stream:
./dump1090 --quiet --net --net-sbs-port 30003 --enable-agc & |
Install the feeder software:
mkdir fr24 cd fr24/ wget https://dl.dropboxusercontent.com/u/66906/fr24feed_arm-rpi_242.tgz tar zxvf fr24feed_arm-rpi_242.tgz |
Sign up to obtain a sharing key:
./fr24feed_arm-rpi_242 --signup |
Fill out the questionnaire. You’ll need the decimal co-ordinates of your radar. Once you got the key you can start sharing:
./fr24feed_arm-rpi_242 --fr24key=<key> --bs-ip=127.0.0.1 --bs-port=30003 |
Run the radar on startup
There are several approaches for this. I created a couple of scripts to start the flight radar.
/home/pi/start_flight_radar.sh:
#!/bin/sh cd /home/pi/git/dump1090/ ./dump1090 --quiet --net --net-sbs-port 30003 --enable-agc& pkill -f fr24feed /home/pi/fr24/fr24feed_arm-rpi_242 --fr24key=<key> --bs-ip=127.0.0.1 --bs-port=30003 |
/etc/init.d/flightradar:
#!/bin/bash # /etc/init.d/flightradar ### BEGIN INIT INFO # Provides: flightradar # Required-Start: $remote_fs $syslog # Required-Stop: $remote_fs $syslog # Default-Start: 2 3 4 5 # Default-Stop: 0 1 6 # Short-Description: Flight Radar # Description: Flight Radar (ADS-B Receiver) ### END INIT INFO case "$1" in start) echo "Starting flightradar" /home/pi/start_flight_radar.sh & ;; stop) echo "Stopping flightradar" killall dump1090 ;; *) echo "Usage: /etc/init.d/flightradar start|stop" exit 1 ;; esac exit 0 |
Don’t forget to run:
sudo chmod +x /etc/init.d/flightradar sudo update-rc.d flightradar defaults |
Attribution
I got inspired from an article by Charly Kühnast who happens to be virtually my neighbor and runs a flight radar in Kervenheim.
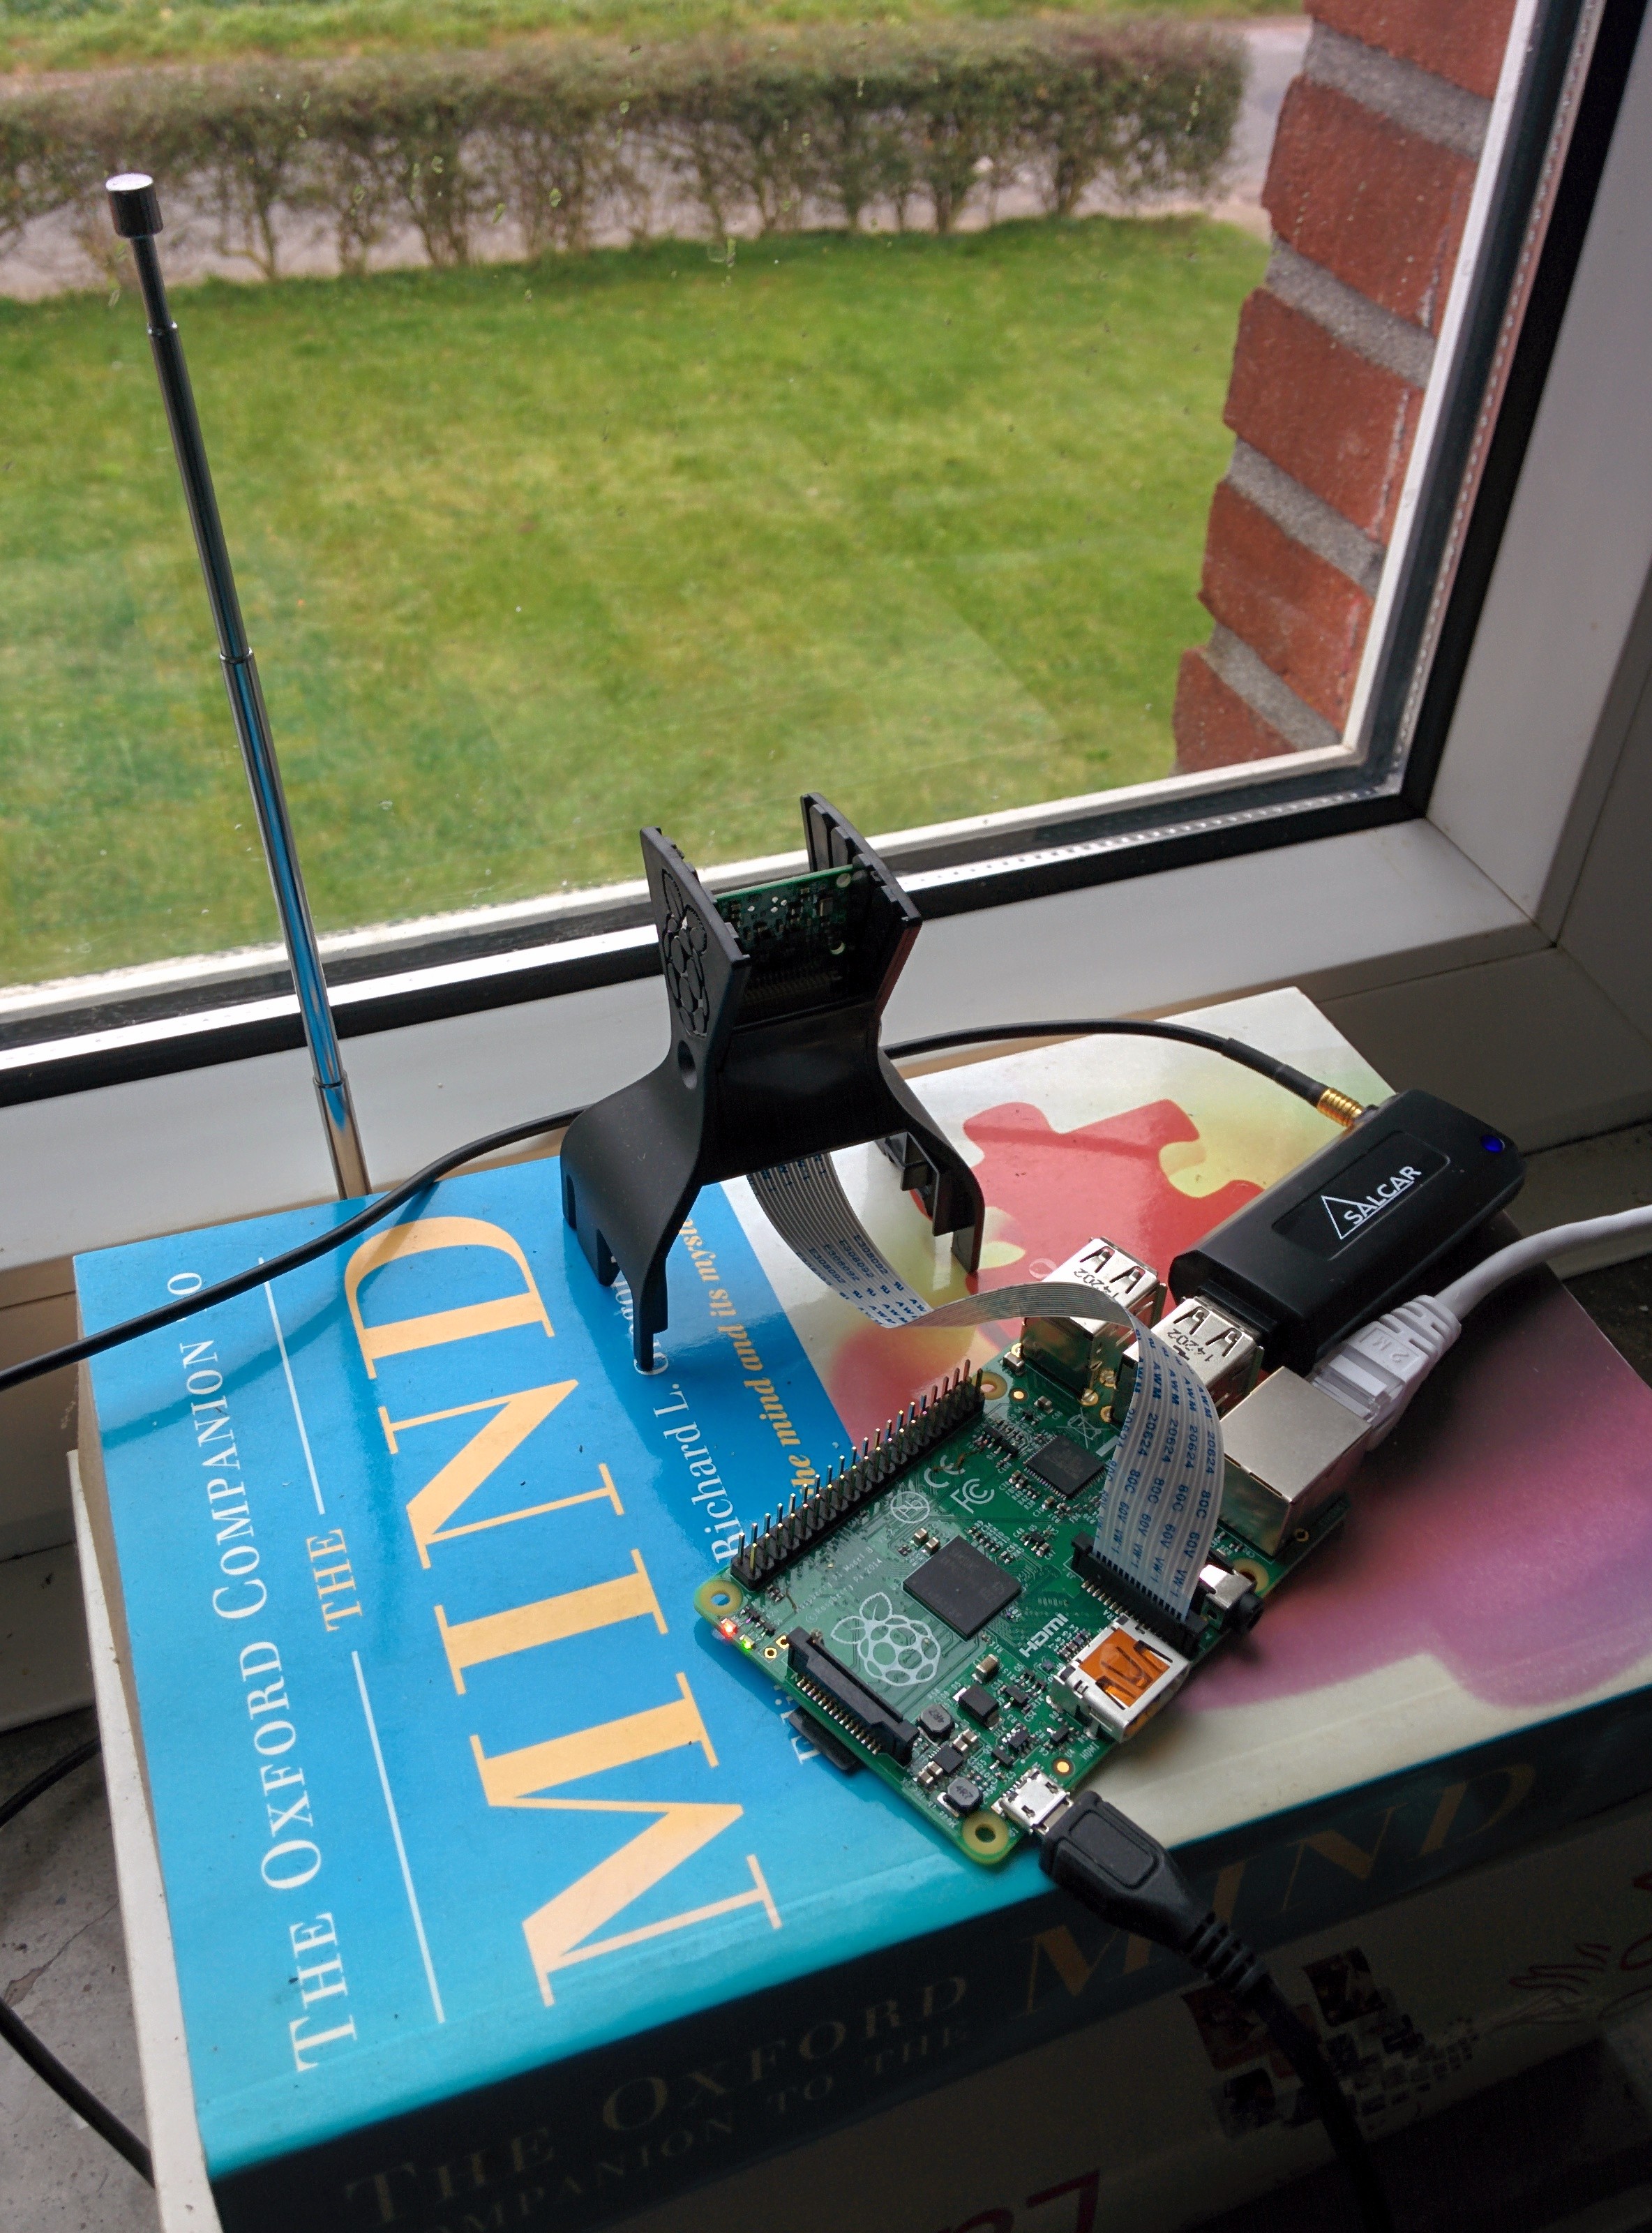
Raspberry Pi running a webcam and a flight radar in Kranenburg-Nütterden:
Hi.
Nice tutorial. Very detailed. I do have a couple of comments.
There are 2 typos in the first line. apt-het and build-essenstial. The command should be:
sudo apt-get -fym install git cmake build-essential libusb-1.0-0-dev
also you might want to give explicit instructions for appending to the config file such as:
sudo chmod 777 raspi-blacklist.conf
sudo echo “blacklist dvb_usb_rtl28xxu” >> raspi-blacklist.conf
sudo chmod 644 raspi-blacklist.conf
sudo is probably not needed on all the above commands.
Note if the SDR receiver is on a USB hub on my keyboard, and then I run dump1090 I get:
$ ./dump1090 –quiet –net –enable-agc
Found 1 device(s):
0: Realtek, RTL2838UHIDIR, SN: 00000001 (currently selected)
usb_claim_interface error -5
Error opening the RTLSDR device: No such file or directory
I am using a NooOlec R820T SDR and DVB-T dongle (NESDR Mini).
If it is plugged directly into the USB port on the RPI it runs fine.
Thanks so much for the detailed installation procedure.
Thank you for your feedback! I have corrected the typos.
I don’t know about the USB error. Might be a power issue.