Contents
Introduction
On your way of becoming an Android developer, you most certainly want to thoroughly understand binding of data to a ListView using an Adapter, simply because you will be using AdapterViews in virtually every app you will develop from now on. In this post we will help you to get started.
We’ll focus on the presentation of your data in Views. Data retrieval from content providers and databases are beyond the scope of this post.
Suppose you’re writing a tourist app for the small German town of Kranenburg in the Reichswald region. Since we love excellent German beers and we might even be craving some solid German food after our outdoor activities, we would like the present the users a list of places where to find those.
Data and views
So let’s start with a simple data set, heavily reduced for demonstration purposes, that is a string array of pub names:
String[] pubArray = {"Gasthof Zu Den Forellenteichen", "Gaststätte Zum Dorfkrug", "Haus Hünnekes"}; |
First, create a new Android project with a blank activity, PubActivity, and its layout file: activity_pub.xml. As we want to display our list, add a ListView to this layout:
<RelativeLayout xmlns:android="http://schemas.android.com/apk/res/android" xmlns:tools="http://schemas.android.com/tools" android:layout_width="match_parent" android:layout_height="match_parent" android:paddingBottom="@dimen/activity_vertical_margin" android:paddingLeft="@dimen/activity_horizontal_margin" android:paddingRight="@dimen/activity_horizontal_margin" android:paddingTop="@dimen/activity_vertical_margin">; <ListView android:id="@+id/pub_list" android:layout_width="match_parent" android:layout_height="match_parent">; </RelativeLayout> |
Now we need to define a layout for our individual list items, or rows, to be displayed. Let’s keep it as simple as possible for now, simple_pub_list_item.xml:
<?xml version="1.0" encoding="utf-8"?> <TextView xmlns:android="http://schemas.android.com/apk/res/android" android:id="@+id/pub_name" android:layout_width="match_parent" android:layout_height="wrap_content" android:gravity="center_vertical" android:paddingLeft="6dip" android:minHeight="?android:attr/listPreferredItemHeight" /> |
Adapter
Next we need to wire up the views of our activity to display the data set. We’ll use an Adapter to bind the data to our views. Android’s built-in ArrayAdapter is suitable in this case.
The ListView needs to know what to show at a given position and the Adapter tells it just that. It does so in two steps. For a given position it 1) inflates the appropriate view and 2) populates the view with data.
So here’s the code for our activity. We retrieve the ListView from our main layout, define an Adapter by telling it which item view to inflate and which data to bind and then set the Adapter to our ListView. Note that the adapter will identify the TextView within our simple_pub_list_item.
package de.nitri.listviewdemo; import android.os.Bundle; import android.app.Activity; import android.view.Window; import android.widget.ArrayAdapter; import android.widget.ListView; public class PubActivity extends Activity { private ListView lvPubs; private ArrayAdapter<String> pubAdapter; @Override protected void onCreate(Bundle savedInstanceState) { super.onCreate(savedInstanceState); requestWindowFeature(Window.FEATURE_NO_TITLE); setContentView(R.layout.activity_pub); lvPubs = (ListView) findViewById(R.id.pub_list); String[] pubArray = {"Gasthof Zu Den Forellenteichen", "Gaststätte Zum Dorfkrug", "Haus Hünnekes"}; pubAdapter = new ArrayAdapter<String>(this, R.layout.simple_pub_list_item, pubArray); lvPubs.setAdapter(pubAdapter); } } |
So there we have it:

OnItemClickListener
In order to interact with the ListView we’ll set a Listener to it which takes the clicked position as an argument:
lvPubs.setOnItemClickListener(new OnItemClickListener() { @Override public void onItemClick(AdapterView<?> arg0, View arg1, int position, long arg3) { Toast.makeText(getBaseContext(), pubArray[position], Toast.LENGTH_SHORT).show(); } }); |
Note that we have to declare pubArray final in order to refer it like this from an inner class.
Another way to accomplish this would be to have our Activity implement the OnItemClickListener interface:
public class PubActivity extends Activity implements OnItemClickListener { private ListView lvPubs; private ArrayAdapter<String> pubAdapter; private String[] pubArray = {"Gasthof Zu Den Forellenteichen", "Gaststätte Zum Dorfkrug", "Haus Hünnekes"}; @Override protected void onCreate(Bundle savedInstanceState) { super.onCreate(savedInstanceState); requestWindowFeature(Window.FEATURE_NO_TITLE); setContentView(R.layout.activity_pub); lvPubs = (ListView) findViewById(R.id.pub_list); pubAdapter = new ArrayAdapter<String>(this, R.layout.simple_pub_list_item, pubArray); lvPubs.setAdapter(pubAdapter); lvPubs.setOnItemClickListener(this); } @Override public void onItemClick(AdapterView<?> arg0, View arg1, int position, long arg3) { Toast.makeText(getBaseContext(), pubArray[position], Toast.LENGTH_SHORT).show(); } } |
ListActivity
For convenience we can also have PubActivity extend ListActivity instead of Activity. ListActivity expects a resource identified by @android:id/list. We can also specify an empty view which will be displayed when no data can be bound. So here’s a new activity_pub.xml:
<RelativeLayout xmlns:android="http://schemas.android.com/apk/res/android" xmlns:tools="http://schemas.android.com/tools" android:layout_width="match_parent" android:layout_height="match_parent" android:paddingBottom="@dimen/activity_vertical_margin" android:paddingLeft="@dimen/activity_horizontal_margin" android:paddingRight="@dimen/activity_horizontal_margin" android:paddingTop="@dimen/activity_vertical_margin" tools:context=".PubActivity" > <ListView android:id="@android:id/list" android:layout_width="match_parent" android:layout_height="match_parent" /> <ListView android:id="@android:id/empty" android:layout_width="match_parent" android:layout_height="match_parent" android:text="No pubs" /> </RelativeLayout> |
Now we can set the Adapter directly to the Activity and override onListItemClick to interact with the user:
public class PubActivity extends ListActivity { private ArrayAdapter<String> pubAdapter; private String[] pubArray = { "Gasthof Zu Den Forellenteichen", "Gaststätte Zum Dorfkrug", "Haus Hünnekes" }; @Override protected void onCreate(Bundle savedInstanceState) { super.onCreate(savedInstanceState); requestWindowFeature(Window.FEATURE_NO_TITLE); setContentView(R.layout.activity_pub); pubAdapter = new ArrayAdapter<String>(this, R.layout.simple_pub_list_item, pubArray); setListAdapter(pubAdapter); } @Override public void onListItemClick(ListView lv, View itemView, int position, long arg3) { Toast.makeText(getBaseContext(), pubArray[position], Toast.LENGTH_SHORT) .show(); } } |
Binding Collections
There is no need to use an immutable array as the model behind your view. For instance, you can use ArrayAdapter to bind an ArrayList of Strings, so you can benefit from the power of the Java Collections Framework.
public class PubActivity extends ListActivity { private ArrayAdapter<String> pubAdapter; private List<String> pubList = new ArrayList<String>(); @Override protected void onCreate(Bundle savedInstanceState) { super.onCreate(savedInstanceState); requestWindowFeature(Window.FEATURE_NO_TITLE); setContentView(R.layout.activity_pub); pubAdapter = new ArrayAdapter<String>(this, R.layout.simple_pub_list_item, pubList); pubList.add("Gasthof Zu Den Forellenteichen"); pubList.add("Gaststätte Zum Dorfkrug"); pubList.add("Haus Hünnekes"); setListAdapter(pubAdapter); } @Override public void onListItemClick(ListView lv, View itemView, int position, long arg3) { Toast.makeText(getBaseContext(), pubList.get(position), Toast.LENGTH_SHORT) .show(); } } |
When the bound collection changes, the Adapter should be notified so that it can update the ListView:
pubAdapter.notifyDataSetChanged(); |
Note that you cannot use this method on adapters that are designed for immutable data, like SimpleAdapter. No error will be returned, but the result won’t be as expected. You can however use it on ArrayAdapter as long as the adapter doesn’t lose reference to the bound dataset.
Binding objects
As a matter of fact, we can bind all object collections this way to ArrayAdapter, as long as the objects can be converted to String with a toString() method. Let’s create a new entity, Pub.java:
package de.nitri.listviewdemo; public class Pub { int id; String name; String locality; public Pub(int id, String name, String locality) { this.id = id; this.name = name; this.locality = locality; } public String toString() { return name; } } |
Whereas we need the id and locality members in our app logic, we here want to demonstrate how to display the name members in a list.
public class PubActivity extends ListActivity { private ArrayAdapter<Pub> pubAdapter; private List<Pub> pubList = new ArrayList<Pub>(); @Override protected void onCreate(Bundle savedInstanceState) { super.onCreate(savedInstanceState); requestWindowFeature(Window.FEATURE_NO_TITLE); setContentView(R.layout.activity_pub); pubAdapter = new ArrayAdapter<Pub>(this, R.layout.simple_pub_list_item, pubList); pubList.add(new Pub(1, "Gasthof Zu Den Forellenteichen", "Nütterden")); pubList.add(new Pub(2, "Gaststätte Zum Dorfkrug", "Nütterden")); pubList.add(new Pub(3, "Haus Hünnekes", "Kranenburg")); setListAdapter(pubAdapter); } @Override public void onListItemClick(ListView lv, View itemView, int position, long arg3) { Toast.makeText(getBaseContext(), pubList.get(position).name, Toast.LENGTH_SHORT) .show(); } } |
Multiple TextViews per item using SimpleAdapter
Suppose we want to display both the name and the locality of our pub objects. To that end we create the following item layout:
<?xml version="1.0" encoding="utf-8"?> <LinearLayout xmlns:android="http://schemas.android.com/apk/res/android" android:layout_width="match_parent" android:layout_height="wrap_content" android:orientation="vertical" android:padding="6dp" > <TextView android:id="@+id/pub_name" android:layout_width="match_parent" android:layout_height="wrap_content" android:gravity="center_vertical" android:paddingLeft="6dip" /> <TextView android:id="@+id/pub_locality" android:layout_width="match_parent" android:layout_height="wrap_content" android:gravity="center_vertical" android:paddingLeft="6dip" android:textSize="12sp" /> </LinearLayout> |
We need to store our data in a List of HashMaps. SimpleAdapter takes an array of hash keys (from) and an array containing the resource ids of our list item TextViews (to).
public class PubActivity extends ListActivity { private SimpleAdapter pubAdapter; private List<Pub> pubList = new ArrayList<Pub>(); @Override protected void onCreate(Bundle savedInstanceState) { super.onCreate(savedInstanceState); requestWindowFeature(Window.FEATURE_NO_TITLE); setContentView(R.layout.activity_pub); pubList.add(new Pub(1, "Gasthof Zu Den Forellenteichen", "Nütterden")); pubList.add(new Pub(2, "Gaststätte Zum Dorfkrug", "Nütterden")); pubList.add(new Pub(3, "Haus Hünnekes", "Kranenburg")); List<Map<String, String>> pubData = new ArrayList<Map<String, String>>(); for (Pub pub : pubList) pubData.add(createRow(pub.name, pub.locality)); String[] from = { "name", "locality" }; int[] to = { R.id.pub_name, R.id.pub_locality }; pubAdapter = new SimpleAdapter(this, pubData, R.layout.simple_pub_list_item, from, to); setListAdapter(pubAdapter); } private Map<String, String> createRow(String name, String locality) { Map<String, String> row = new HashMap<String, String>(); row.put("name", name); row.put("locality", locality); return row; } @Override public void onListItemClick(ListView lv, View itemView, int position, long arg3) { Toast.makeText(getBaseContext(), pubList.get(position).name, Toast.LENGTH_SHORT).show(); } } |

Creating a custom adapter
The other approach would be to create our own adapter. As stated the above, the adapter inflates and populates the view for a given list item position. To that end the ListView calls the adapter’s getView() method. So we’ll have to extend an Adapter class (like BaseAdapter or ArrayAdapter) and override that method to suit our needs.
public class PubActivity extends ListActivity { private PubAdapter pubAdapter; private List<Pub> pubList = new ArrayList<Pub>(); @Override protected void onCreate(Bundle savedInstanceState) { super.onCreate(savedInstanceState); requestWindowFeature(Window.FEATURE_NO_TITLE); setContentView(R.layout.activity_pub); pubList.add(new Pub(1, "Gasthof Zu Den Forellenteichen", "Nütterden")); pubList.add(new Pub(2, "Gaststätte Zum Dorfkrug", "Nütterden")); pubList.add(new Pub(3, "Haus Hünnekes", "Kranenburg")); pubAdapter = new PubAdapter(this, pubList); setListAdapter(pubAdapter); } @Override public void onListItemClick(ListView lv, View itemView, int position, long arg3) { Toast.makeText(getBaseContext(), pubList.get(position).name, Toast.LENGTH_SHORT).show(); } private class PubAdapter extends ArrayAdapter<Pub> { private Context context; private List<Pub> pubList; public PubAdapter(Context context, List<Pub> pubList) { super(context, R.layout.simple_pub_list_item, pubList); this.context = context; this.pubList = pubList; } @Override public View getView(int position, View convertView, ViewGroup parent) { LayoutInflater inflater = (LayoutInflater) context .getSystemService(Context.LAYOUT_INFLATER_SERVICE); View itemView = inflater.inflate(R.layout.simple_pub_list_item, parent, false); TextView tvName = (TextView) itemView.findViewById(R.id.pub_name); TextView tvLocality = (TextView) itemView.findViewById(R.id.pub_locality); tvName.setText(pubList.get(position).name); tvLocality.setText(pubList.get(position).locality); return itemView; } } } |
Using convertView
View inflation is expensive. Therefore, ListView is able to recycle views that are not currently on display. Use convertView in the getView() method to retrieve this views if they exist. Note that you still have to populate them with data.
private class PubAdapter extends ArrayAdapter<Pub> { private Context context; private List<Pub> pubList; LayoutInflater inflater; public PubAdapter(Context context, List<Pub> pubList) { super(context, R.layout.simple_pub_list_item, pubList); this.context = context; this.pubList = pubList; inflater = (LayoutInflater) context .getSystemService(Context.LAYOUT_INFLATER_SERVICE); } @Override public View getView(int position, View convertView, ViewGroup parent) { if (convertView == null) { convertView = inflater.inflate(R.layout.simple_pub_list_item, parent, false); } TextView tvName = (TextView) convertView .findViewById(R.id.pub_name); TextView tvLocality = (TextView) convertView .findViewById(R.id.pub_locality); tvName.setText(pubList.get(position).name); tvLocality.setText(pubList.get(position).locality); return convertView; } } |
Adding icons
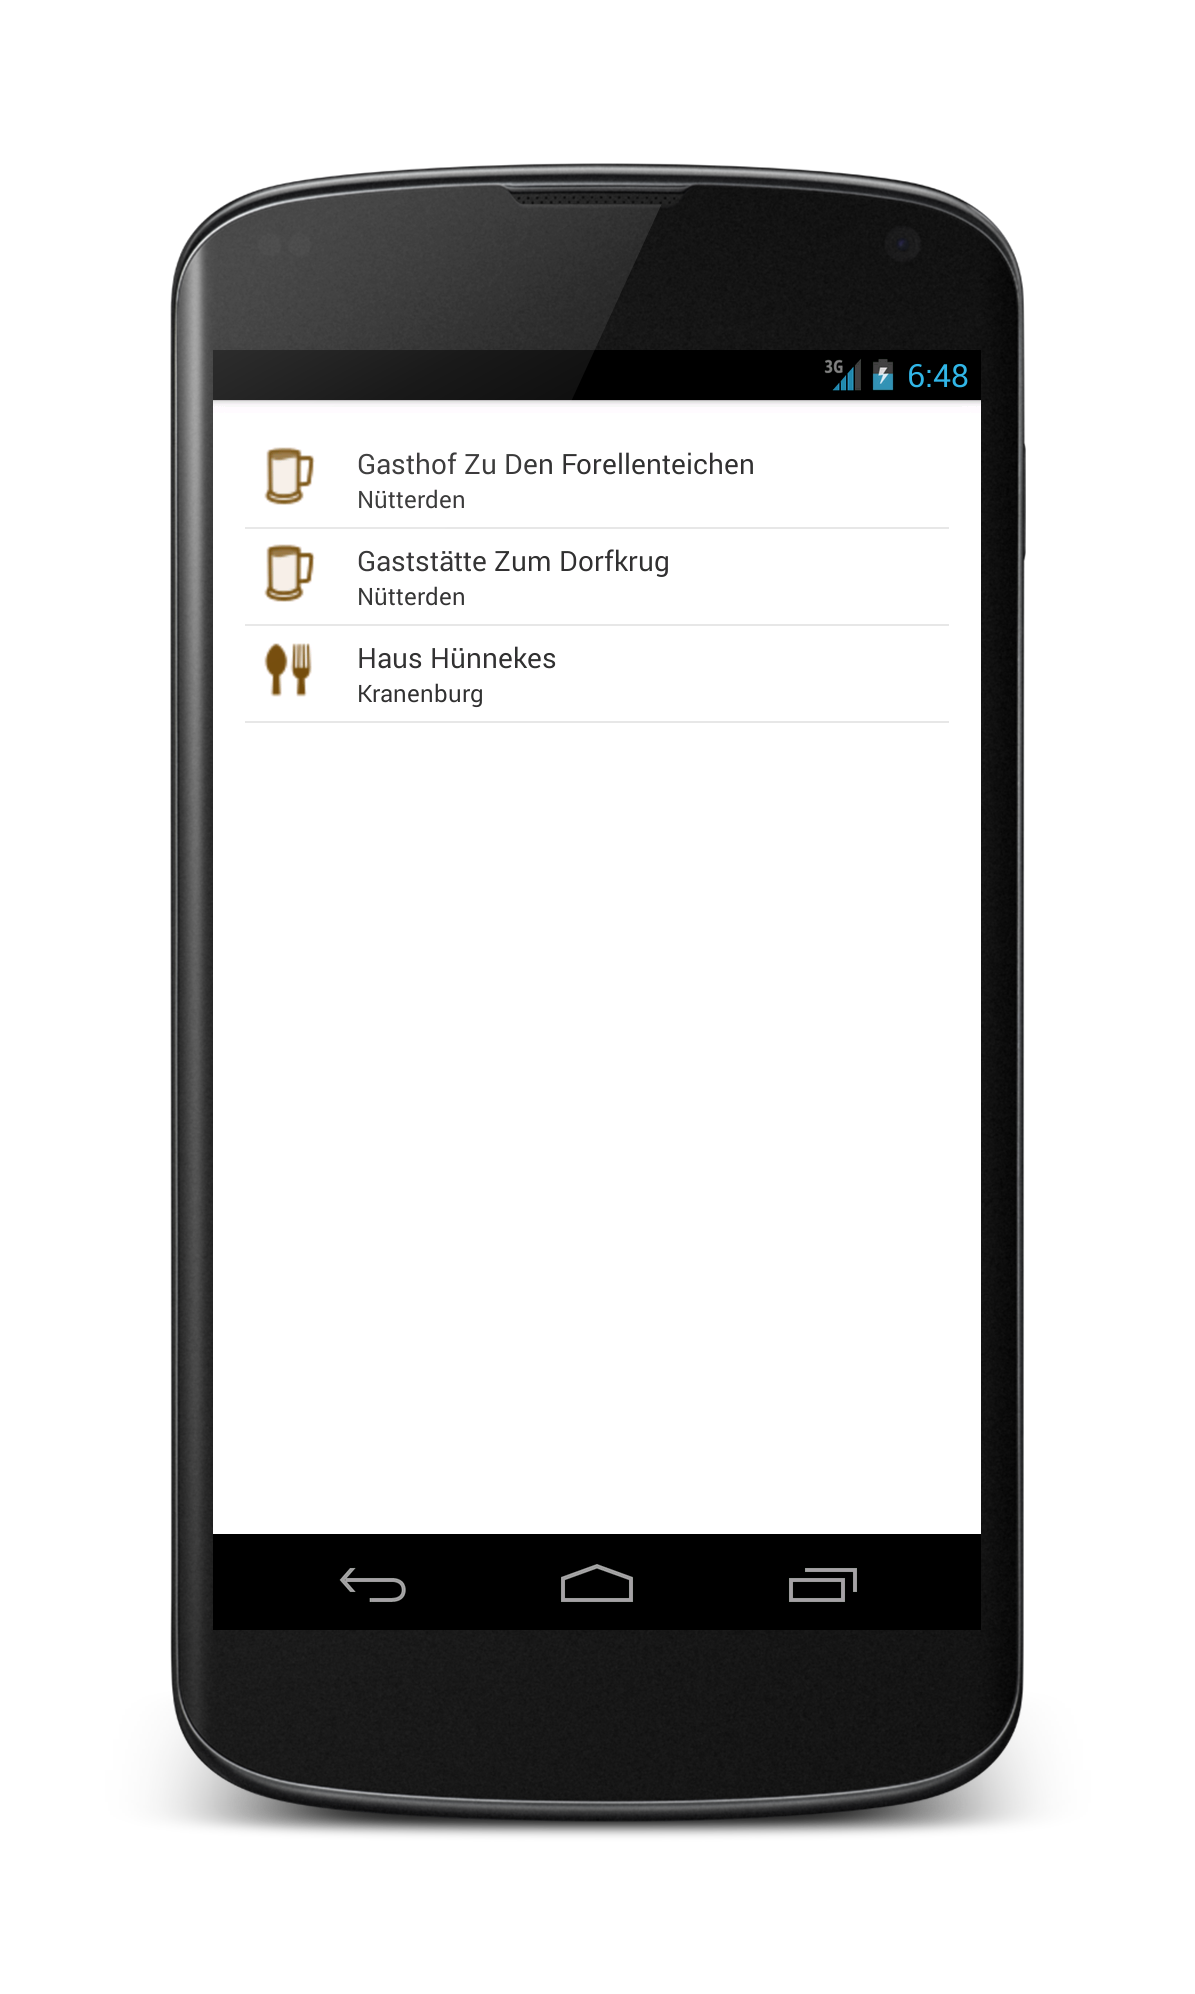
Adding a default icon to the item view is as easy as incorporating an ImageView in the XML layout. Let’s add some pointless icons to our list.
![]()
![]()
<?xml version="1.0" encoding="utf-8"?> <LinearLayout xmlns:android="http://schemas.android.com/apk/res/android" android:layout_width="match_parent" android:layout_height="wrap_content" android:orientation="horizontal" > <ImageView android:id="@+id/icon" android:layout_width="wrap_content" android:layout_height="wrap_content" android:gravity="center_vertical" android:padding="6dip" android:src="@drawable/food_biergarten" /> <LinearLayout android:layout_width="match_parent" android:layout_height="wrap_content" android:gravity="center_vertical" android:orientation="vertical" android:padding="6dp" > <TextView android:id="@+id/pub_name" android:layout_width="match_parent" android:layout_height="wrap_content" android:gravity="center_vertical" android:paddingLeft="6dip" /> <TextView android:id="@+id/pub_locality" android:layout_width="match_parent" android:layout_height="wrap_content" android:gravity="center_vertical" android:paddingLeft="6dip" android:textSize="12sp" /> </LinearLayout> </LinearLayout> |
Now that we have set a default icon we can dynamically change it in the getView() method.
@Override
        public View getView(int position, View convertView, ViewGroup parent) {

            if (convertView == null) {
                convertView = inflater.inflate(R.layout.simple_pub_list_item,
                        parent, false);
            }
            ImageView ivIcon = (ImageView) convertView.findViewById(R.id.icon);
            TextView tvName = (TextView) convertView
                    .findViewById(R.id.pub_name);
            TextView tvLocality = (TextView) convertView
                    .findViewById(R.id.pub_locality);
            if (pubList.get(position).id == 3)
                ivIcon.setImageResource(R.drawable.food_restaurant);
            tvName.setText(pubList.get(position).name);
            tvLocality.setText(pubList.get(position).locality);
            return convertView;
} |
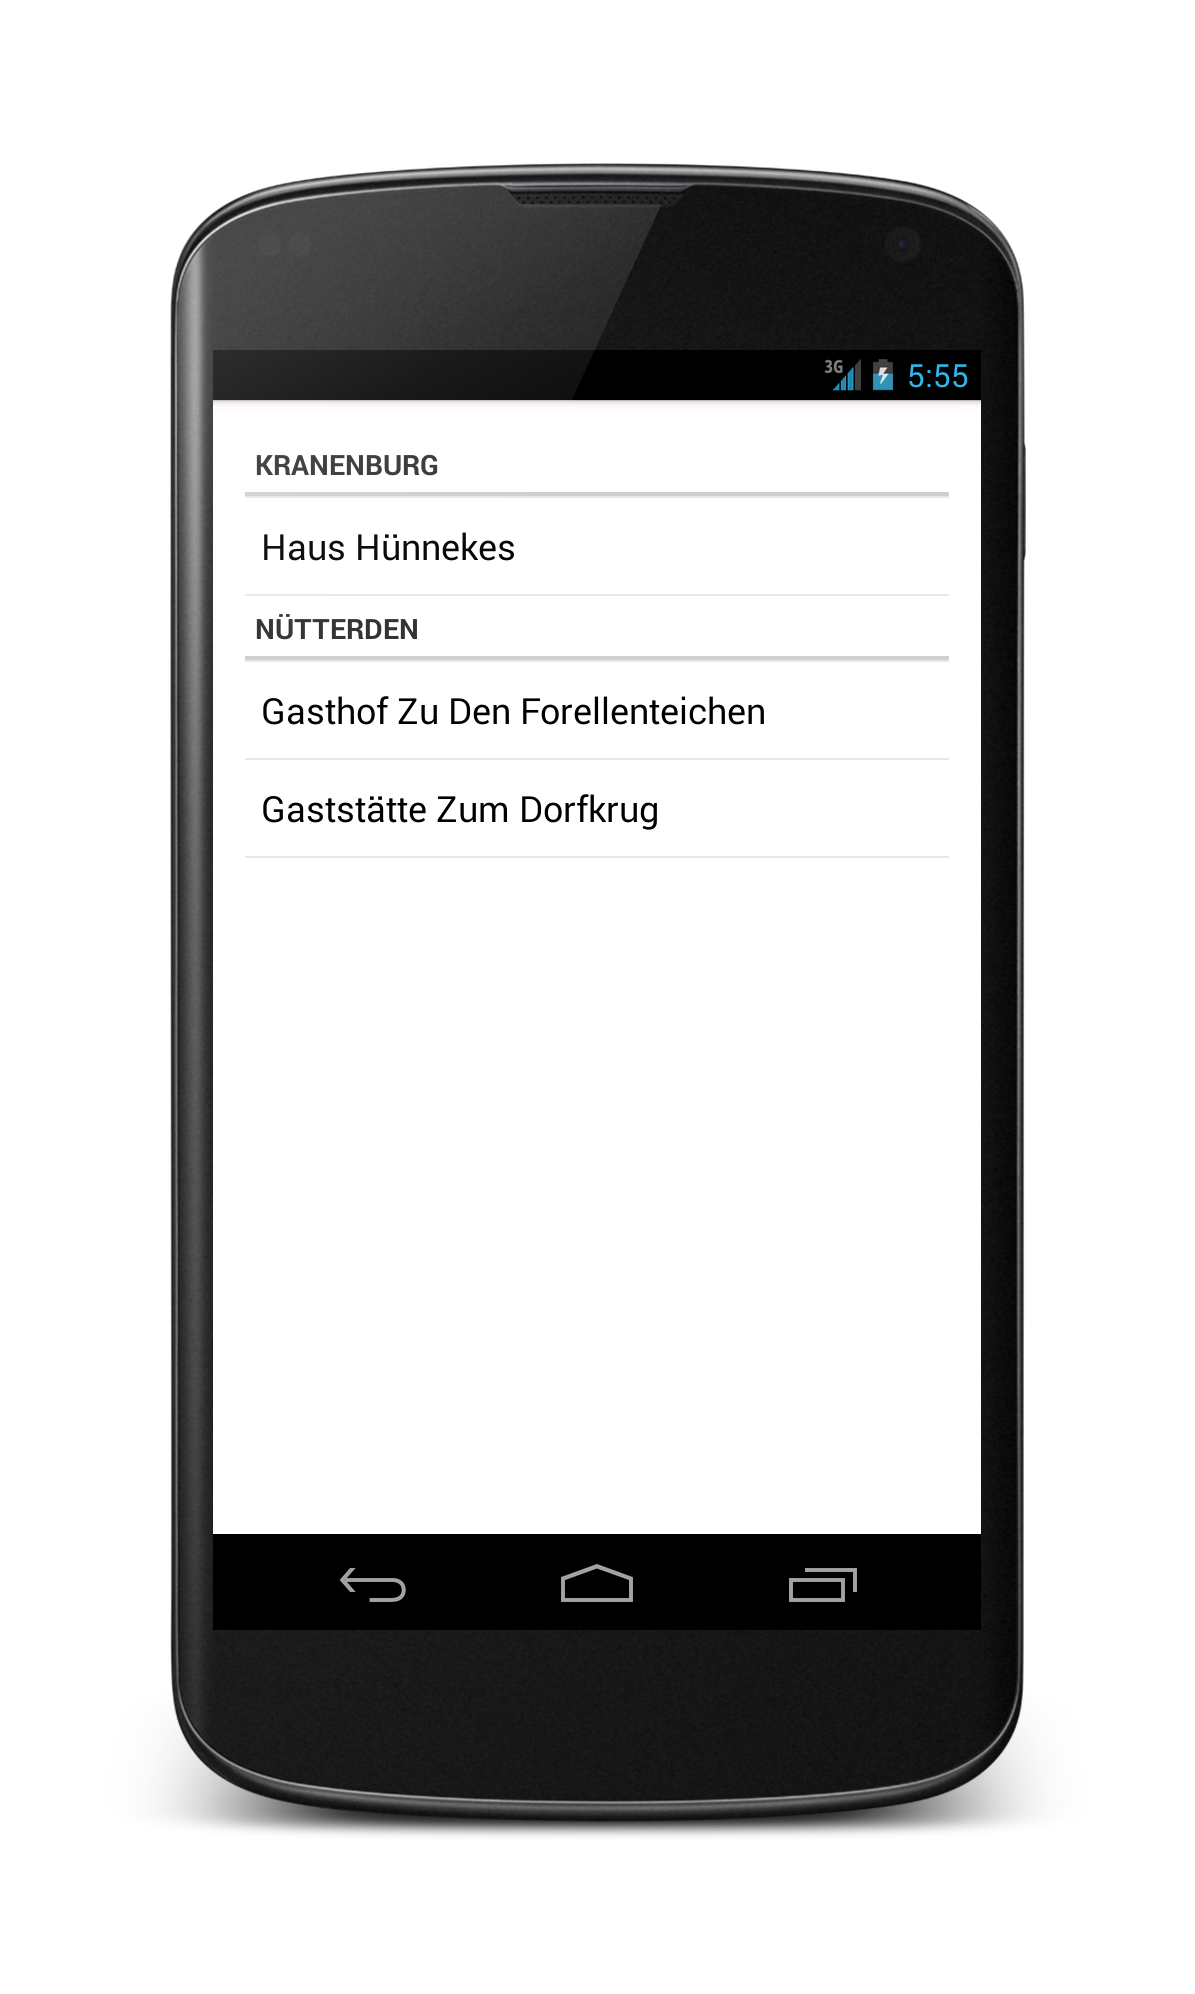
Sectioned ListView
By overriding the getView() method, we can return different views based on the data passed to the adapter, for instance single line items, multiple line items, unclickable separators and even entire AdapterViews. Suppose we want distinct sections for the localities in our data. What we want to achieve is this (we keep it unfancy, so we can focus on the basic idea):
First we create a simple separator layout and style it the default Android way, list_header.xml:
<TextView xmlns:android="http://schemas.android.com/apk/res/android" android:id="@+id/list_header_title" android:layout_width="fill_parent" android:layout_height="wrap_content" android:paddingTop="2dip" android:paddingBottom="2dip" android:paddingLeft="5dip" style="?android:attr/listSeparatorTextViewStyle" /> |
To bind the clickable items within their sections we’ll use a standard ArrayAdapter and a simple item layout provided by the Android SDK. To bind these sections in our main ListView we’ll use the SeparatedListAdapter by Jeff Sharkey, basically an adapter that binds other adapters, one for each section:
public class SeparatedListAdapter extends BaseAdapter { public final Map<String, Adapter> sections = new LinkedHashMap<String, Adapter>(); public final ArrayAdapter<String> headers; public final static int TYPE_SECTION_HEADER = 0; public SeparatedListAdapter(Context context) { headers = new ArrayAdapter<String>(context, R.layout.list_header); } public void addSection(String section, Adapter adapter) { this.headers.add(section); this.sections.put(section, adapter); } public Object getItem(int position) { for (Object section : this.sections.keySet()) { Adapter adapter = sections.get(section); int size = adapter.getCount() + 1; // check if position inside this section if (position == 0) return section; if (position < size) return adapter.getItem(position - 1); // otherwise jump into next section position -= size; } return null; } public int getCount() { // total together all sections, plus one for each section header int total = 0; for (Adapter adapter : this.sections.values()) total += adapter.getCount() + 1; return total; } public int getViewTypeCount() { // assume that headers count as one, then total all sections int total = 1; for (Adapter adapter : this.sections.values()) total += adapter.getViewTypeCount(); return total; } public int getItemViewType(int position) { int type = 1; for (Object section : this.sections.keySet()) { Adapter adapter = sections.get(section); int size = adapter.getCount() + 1; // check if position inside this section if (position == 0) return TYPE_SECTION_HEADER; if (position < size) return type + adapter.getItemViewType(position - 1); // otherwise jump into next section position -= size; type += adapter.getViewTypeCount(); } return -1; } public boolean areAllItemsSelectable() { return false; } public boolean isEnabled(int position) { return (getItemViewType(position) != TYPE_SECTION_HEADER); } @Override public View getView(int position, View convertView, ViewGroup parent) { int sectionnum = 0; for (Object section : this.sections.keySet()) { Adapter adapter = sections.get(section); int size = adapter.getCount() + 1; // check if position inside this section if (position == 0) return headers.getView(sectionnum, convertView, parent); if (position < size) return adapter.getView(position - 1, convertView, parent); // otherwise jump into next section position -= size; sectionnum++; } return null; } @Override public long getItemId(int position) { return position; } } |
Since we want to separate the data items by locality, we first sort the collection by this field. Then we loop through the collection and add a section to our main adapter when the locality changes. Furthermore, we keep track of the positions of clickable items in a HashMap that we can use in OnItemClickListener.
public class PubActivity extends ListActivity { private SeparatedListAdapter pubSectionAdapter; private List<Pub> pubList = new ArrayList<Pub>(); HashMap<Integer, Pub> pubItemPositions = new HashMap<Integer, Pub>(); @Override protected void onCreate(Bundle savedInstanceState) { super.onCreate(savedInstanceState); requestWindowFeature(Window.FEATURE_NO_TITLE); setContentView(R.layout.activity_pub); Comparator<Pub> pubLocalityComparator = new Comparator<Pub>() { @Override public int compare(Pub pub1, Pub pub2) { return pub1.locality.compareTo(pub2.locality); } }; pubList.add(new Pub(1, "Gasthof Zu Den Forellenteichen", "Nütterden")); pubList.add(new Pub(2, "Gaststätte Zum Dorfkrug", "Nütterden")); pubList.add(new Pub(3, "Haus Hünnekes", "Kranenburg")); Collections.sort(pubList, pubLocalityComparator); ArrayList<String> values = new ArrayList<String>(); String localityHeaderText; String previousLocalityHeaderText = ""; pubSectionAdapter = new SeparatedListAdapter(this); int position = 0; for (Pub pub : pubList) { localityHeaderText = pub.locality; if ((!previousLocalityHeaderText.equals("") && !previousLocalityHeaderText.equals(localityHeaderText)) ) { pubSectionAdapter.addSection(previousLocalityHeaderText, new ArrayAdapter<String>(this, android.R.layout.simple_list_item_1, values)); position++; // unclickable header inserted values = new ArrayList<String>(); } values.add(pub.name); position++; pubItemPositions.put(position, pub); previousLocalityHeaderText = new String(localityHeaderText); } // last section pubSectionAdapter.addSection(previousLocalityHeaderText, new ArrayAdapter<String>(this, android.R.layout.simple_list_item_1, values)); setListAdapter(pubSectionAdapter); } @Override public void onListItemClick(ListView lv, View itemView, int position, long arg3) { Toast.makeText(getBaseContext(), pubItemPositions.get(position).name, Toast.LENGTH_SHORT).show(); } } |
It’s rather complicated, but there we have it: a clickable sectioned ListView.
One thought on “Android ListViews”
Comments are closed.